Slim Cycle Assembly – Helping Users Who Lost Their Manual

Quick Info on the Slim Cycle
- Does the Slim Cycle come assembled? It does not. You must set aside 45 minutes to assembling the bike.
- Is the Slim Cycle any good? Yes, it is. As a matter of fact, you will save money in not having to buy a gym membership.
- Does the Slim Cycle have a weight limit? The maximum weight capacity of the bike is 300 lbs.
- How long do you need to ride to lose weight? American Council on Exercise (ACE) says you’ll need to cycle at a moderately intense level for at least 30 minutes at a time.
Introduction

The Slim Cycle Assembly is specifically useful for users of the Slim Cycle who have lost their manual. Or purchased it and a manual did not come with the bike. Before the bike left the factory, it was inspected and tested for proper operation.
This article is written for those who have a need to assemble their Slim Cycle and don’t have any instructions to follow. The aim of this post is to provide this information.
When assembling the cycle, be sure to set it up according to your body type. The seat and bars are adjustable so it can fit best for your body type. Of course, when using the Slim Cycle be sure it is on a flat level surface in a well-lit and ventilated area.
We have other Slim Cycle articles you might want to check out: Slim Cycle Workouts and Slim cycle Control Panel Instruction.
The Parts List
The first thing you need to do is to ensure that all of the parts are in the box. Below is a list of all the parts needed for assembling the Slim Cycle.
- Main Frame
- Seat Post
- Rear Foot
- Front Foot with Rollers
- Backrest Support
- Seat Handles
- Handlebars
- Seat
- Backrest
- Control Panel
- Washers and Screws
- 2 washers for seat handles
- 2 screws for seat handles
- 2 screws for backseat
- Other screws, washers and nuts come installed in parts.
- Small Hex Key Tool
- Large Hex Key Tool/Screwdriver Tool
- Wrench
- Pedals
- Pedal Straps
It is advisable to lay out these parts so you can get at them easily during the assembly.
Slim Cycle Assembly Instructions
Below are the steps in assembling the Slim Cycle. Follow these instructions exactly in order to ensure the Slim Cycle bike is assembled correctly.
- Loosen circular knob on Main Frame and pull outward to adjust recline angle to 1 (tallest setting).
- Take both nuts and washers off the rear foot.
- Place the nuts and washers to the side for now.
- Install rear foot into rear main frame leg. Refer to image to ensure rear foot is installed on correct leg.
- Place washer onto screw.
- Screw on the nut.
- Tighten nut onto screw using the included wrench. Repeat on the other side.
- Take both nuts and washers off of front foot with rollers.
- Place washers and nuts aside for now.
- Install front foot onto main frame leg.
Note: The rollers help to move the bike when it’s tilted forward and should not touch the floor when the bike is in a regular standing position. When properly installed, the rollers will face outward from the front of the bike. If the rollers touch the floor, uninstall the foot, turn around, and reinstall.
- Place the washer onto screw.
- Screw on the nut.
- Tighten nut onto screw using the included wrench. Repeat with the other side.
- Take the nuts and washers off the seat cushion.
- Place the nuts and washers aside for now.
- Fit seat post onto seat cushion screws.
- Place the washers over the screws from seat cushion.
- Finger tighten each nut onto the screws from seat cushion. If difficult to tighten, nut may be upside-down. Loosen and turn nut right side up and retighten screws using finger.
- Tighten nut onto screw using the included wrench. Repeat on the other two nuts.
- Loosen triangular knob and remove from the main frame.
- Insert seat post into main frame.
- Secure the knob back in place at the desired height.
- Remove screw, nut and washer from the backrest support.
- Place the screw, nut, and washer to the side for now.
- Align the backrest support with the hole in the seat post.
- Insert screw through hole in the backrest support.
- Place washer onto the screw.
- Place the nut on screw and finger tighten. If difficult to tighten, nut may be upside-down. Remove nut and turn right side-up, and finger tighten.
- Tighten the nut using the included wrench.
- Place washers onto screws for the seat handles.
- Align the seat handles with holes on the bottom of the backrest support.
- Place the screws into holes and finger tighten.
- Tighten down screws using the included large hex key/screwdriver tool.
- Align backrest against backrest support. Insert screws and finger tighten.
- Tighten down screws using the included large hex key/screwdriver tool.
- Remove screws from the handlebar.
- Place screws to the side for now.
- Feed handlebar posts into the slots on the top of the main frame.
- Place screws into holes and finger tighten.
- Tighten down screws using the included small hex key tool.
- Remove the screws from the back of the control panel.
- Starting with the largest connector, feed each of the three wires through the hole in the center of handlebar bracket.
- Place the control panel onto the handlebar bracket.
- Insert screws and finger tighten.
- Tighten screws with the included large hex key/screwdriver tool.
- Connect each of the three wires from bike to the control panel. Either of the 2 small female connectors can connect to either of the 2 small male connectors.
- Connect the right pedal to the right crank arm. Both parts are marked with an R.
- Hold the right pedal with one hand and screw the pedal bolt onto the crank arm with the other hand in a standard clockwise Finish tightening with the included wrench.
- Connect the left pedal to the left crank arm. Both parts are marked with an L.
- Hold the left pedal with one hand and screw the pedal bolt onto the crank arm with the other hand in a non-standard counterclockwise motion. Finish tightening with the included wrench.
- The strap marked R goes on the right pedal. The strap marked L goes on the left pedal. With R or L marking facing upward, attach the end of the strap with 3 holes to the inside of the pedal.
- Attach the end of the strap with 4 holes to the outside of the pedal. Adjust strap to your preference.
Control Panel Battery Installation
Below are the steps to install the batteries into the control panel.
Please note: Control Panel Requires 2 AA batteries. Do not mix old and new batteries. Do not mix alkaline with standard (carbon-zinc), or rechargeable (NiCd, Ni-Mh, etc.) batteries.
Installation Steps
Step 1. Open battery compartment door on the back of the Slim Cycle control

panel.
Step 2. Note the diagram inside the compartment that shows the correct battery installation polarity.
Step 3. Install 2 AA batteries (included) according to the correct polarity. Note: If your unit did not come with batteries, install using 2 AA batteries. Or the original ones are old and need to be replaced.
Step 4. Replace the battery compartment door.
Note: If the control panel does not light up, check that the batteries were installed in the correct polarity position. If not, change the batteries to the correct polarity position. The control panel unit should come on. If not, you have an issue with the control panel and must contact customer support for assistance.
Questions About the Slim Cycle
- Does the Slim Cycle come assembled? Answer: No, it does not. You must assemble the bike. This could take about 45 minutes to assemble. Some sellers like Amazon offer expert assembly assistance for an additional cost.
- Is the Slim Cycle any good? Answer: Absolutely it is good. It is a great way to get exercise in the home without having to pay extra for a gym membership. On Amazon, over 14,100 customers have rated the Slim Cycle and have given the bike 4.6 stars.
- Is there a weight limit for the slim cycle? Answer: Yes. The maximum weight capacity is 300 lbs.
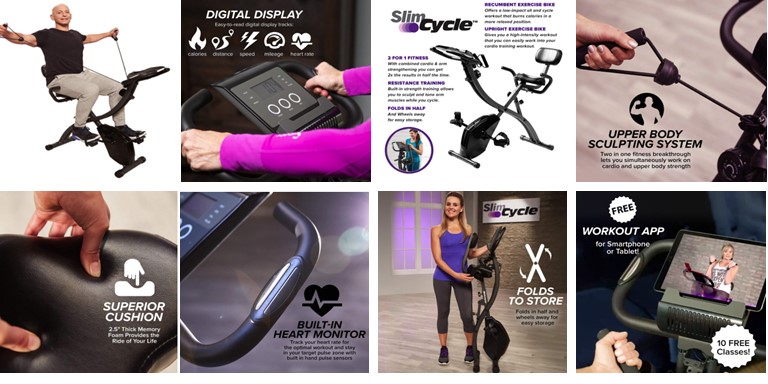
- Does the Slim Cycle fold up? Answer: Absolutely. It folds so it can fit in the closet or under the bed for easy storage.
- How long should you ride a stationary bike to lose weight? Answer: In order to lose weight, the American Council on Exercise (ACE) says you’ll need to cycle at a moderately intense level for at least 30 minutes at a time. To burn even more calories, you’ll want to cycle for longer. Even if you cycle for less time, it is good for you.
Conclusion
There you have it. How to assemble your slim Cycle bike. If you need to disassemble it for any reason, just go in reverse order.
As an Amazon associate I earn from qualified purchases.
Shop for this bike by clicking on the following link: Click Here!
Go back to the Pros Cons Shopping home page.