Restore Headlights Without Using Any Tools!

Introduction
If you have owned your car for some time, you may have noticed the headlight lenses are not as bright as when the car was new. This happens as the headlights are exposed to heat and oxidation. The headlight lenses become a yellowish color thus reducing nighttime illumination. If you fail to correct this situation you can experience close calls when driving at night in trying to avoid any potholes and other obstacles in the road when it’s difficult to see ahead.
It is very important that your lights are bright when traveling at night. The biggest cause of darker lights is the oxidation on the surface of the headlight lenses which causes them to get dull.
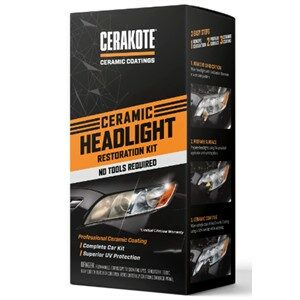
This situation is very easily corrected by using the Cerakote headlight restoration kit. The kit comes with all the non-power tools needed to remove that yellowish tint on the lights and restore them like new.
What Is the Cerakote Headlight Restoration Kit?
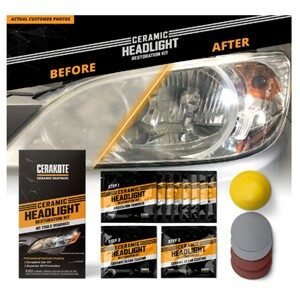
Basically, it’s a very simple kit to restore your headlights to the way were when the car was brand new. It removes the oxidation and the haze that dulls the headlights, reducing their effectiveness.
This kit works differently than other headlight restoration kits. It does not use any specialized power tools. It works in just three simple steps and does not take hours to do. You can complete all the steps within 30 minutes.
After following the steps, the headlights are protected with a ceramic UV protection coating that will last the lifetime of your car.
It won’t damage the paint.
What Is In The Box?

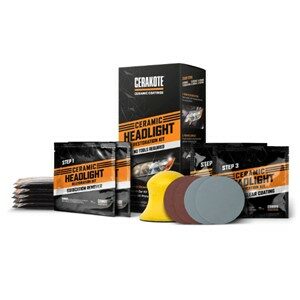
Below is an inventory of what is in the headlight restoration kit box.
- 8 Ceramic Oxidation Remover Packets
- 1 Sander Applicator Block
- 2 Gray Sanding Discs
- 2 Red Sanding Discs
- 2 Ceramic Clear Coat Packets
- 2 Pairs of Gloves
How Does It Work?
The total time required to complete all of the steps is 30 minutes. Follow the easy steps below.

Tip: You may want to have a spray bottle of water handy and ready to use when it is required in the steps below.
- Before you begin, wash the headlights thoroughly using any car soap and rinse well with water.
- If needed, open the car’s hood for easier access to the headlights.
- Use 3M tape around the headlight edges to prevent any oxidation remover getting on the paint.
- Remove the oxidation by putting on one pair of gloves supplied in the kit and open one of the oxidation remover wipes from the packet and wipe in a scrubbing circular motion on the headlight lens surface. Repeat this step by using all four (4) of the oxidation wipe packets. Repeat this step for the other headlight using the other 4 packets. Note: You will notice that the oxidation wipe will become yellow this is normal as it is removing oxidation from the surface of the headlight.
- After the wiping is complete, rise the area thoroughly with water. Complete step 3 above on all headlights before proceeding to step 5.
- Now, prepare the surface by fastening the red sanding disc to the special sanding tool applicator. Wet the red sanding disc and headlight with water. Scrub the headlight in a uniform non-circular motion for two to three minutes. Be sure to keep the lens wet during this process. When finished, rinse the headlight with water. Repeat this process for the other headlight.
- Now, fasten the gray sanding disc to the applicator. Be sure to remove the red sanding disc before attaching the gray disc. Sand the headlight in a uniform non-circular motion for two to three minutes making sure the headlight is wet the entire time. In hard-to-reach areas, you may have to remove the disc. When done, rinse the entire area with water and dry using a soft towel. Be sure the area is completely dry. You may have to use multiple towels. Repeat this process for the other headlight. Tip: If you have access to compressed air, use it to remove water from areas the towel could not reach. The area must be completely dry before proceeding to step 7. Tip 2: You may have to use the gray disc longer than 3 minutes for extremely oxidized headlights. Try 8 minutes.
- Put on the second pair of clean gloves in the kit and open one of the ceramic clear coat packets. Take the wipe and begin at the top of the headlight and move across the headlight in a single direction. When you reach the end of the far side of the headlight start again by overlapping the previous wipe by 50 percent. Continue this process until you have wiped the entire headlight. Repeat this process on the other headlight using the second ceramic clear coat packet.
- Allow the clear coat to dry for one hour before driving and exposing the headlight to any moisture.
Video – How To Use Cerakote Headlight Restoration Kit
An excellent video showing you how to use the kit to clean the headlights on your car.
PROS
- No power tools required
- Takes 30 minutes to complete process
- Restores headlights like new
- Protects from UV rays
- Three easy steps
- Not expensive, under $20
CONS
- Requires elbow grease
- Requires extra sanding work on hard oxidized headlights
Conclusion
We all have experienced our headlight lens being colored and not emitting enough light at night. With the Cerakote headlight cleaning system you can easily remove off oxidation and other stuff to make your headlights shine just like new.
So, if you want to have nice and bright headlights try the Cerakote headlight cleaning system.
It is very easy to apply as it just takes three steps and no more than 30 minutes to complete the process.
Shop Cerakote Headlight Cleaning System
You can shop for the Cerakote cleaning system below. You will be taken to Amazon to place the order. We also have provided a link for the Cerakote Ceramic Trim Coat Kit for restoring the plastic trim on your car.
As an Amazon associate, I earn from qualified purchases.
Headlight Kit
Trim Kit
Go back to the Pros Cons Shopping home page.